AWSのmanaged Kubernetesで、これまでプライベートベータだったElastic Container Service for Kubernetes がGAになった ということなので、さくっとクラスタを作成してみました。1
参考にしたのはAWS公式、EKSのGetting Started Guide です。
まずはEKSのページを見てみようとしたところ・・・
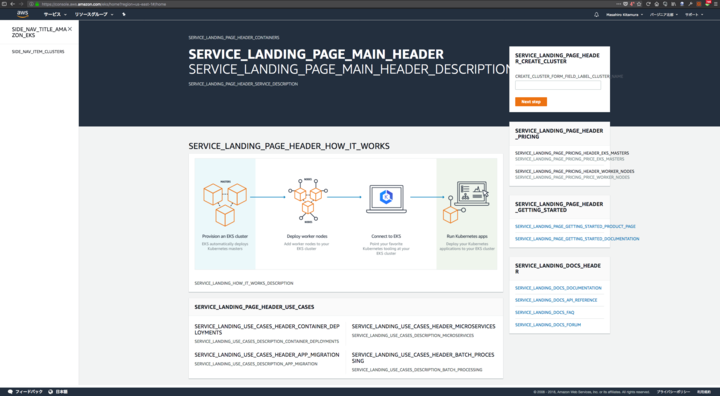 ぶっ壊れてますね!これはなんかアレですね。
gettext的なのが上手くいっていないように見えるので、画面下から英語にしてみます。
ぶっ壊れてますね!これはなんかアレですね。
gettext的なのが上手くいっていないように見えるので、画面下から英語にしてみます。
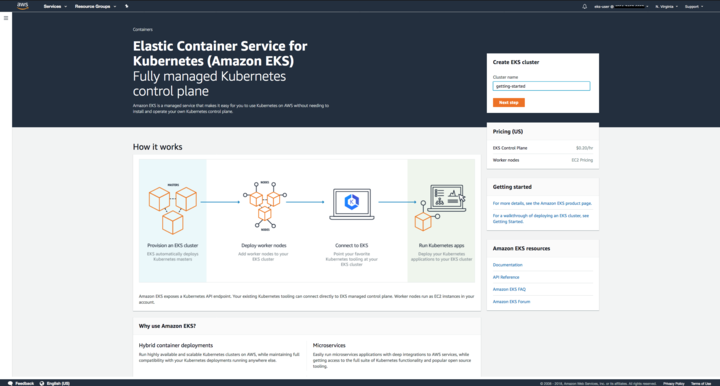
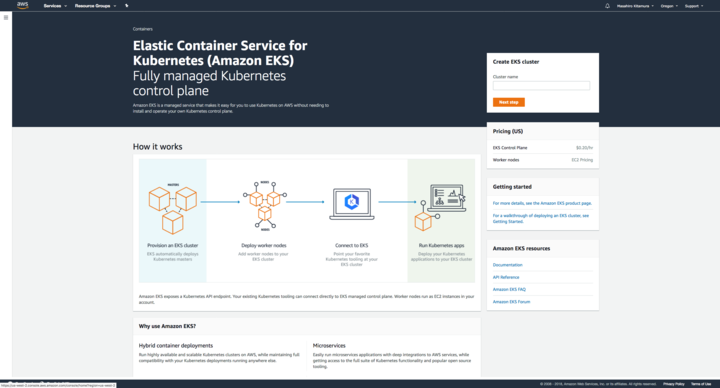 無事、正しいと思われるページが表示されました。
なんか、How it worksの説明の図がちょっとぼやけて見えるのは環境のせいでしょうか。
無事、正しいと思われるページが表示されました。
なんか、How it worksの説明の図がちょっとぼやけて見えるのは環境のせいでしょうか。
扨、ここからGetting Startedしていきます。
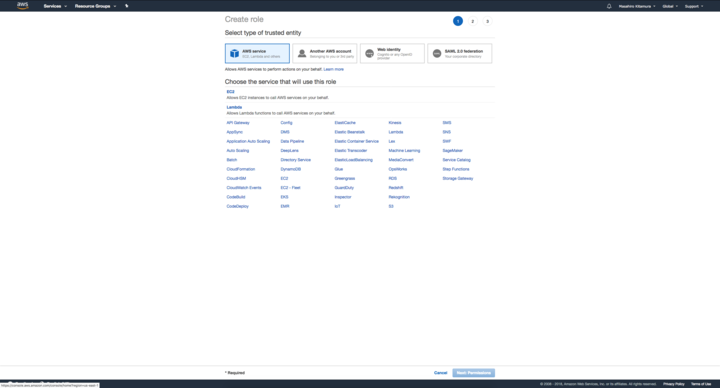 まずはEKS用のIAMロールを作っていきます。
IAMロール作成画面のサービスリストにEKSが追加されていますので、これを選択します。
まずはEKS用のIAMロールを作っていきます。
IAMロール作成画面のサービスリストにEKSが追加されていますので、これを選択します。
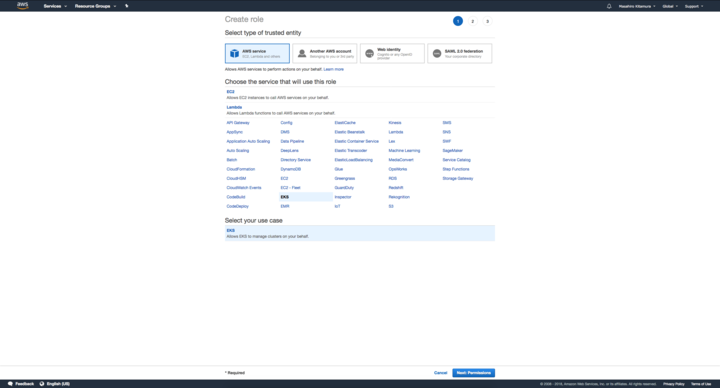 ユースケースは一つしかなく、選択済みになっています。
 フムー。
フムー。
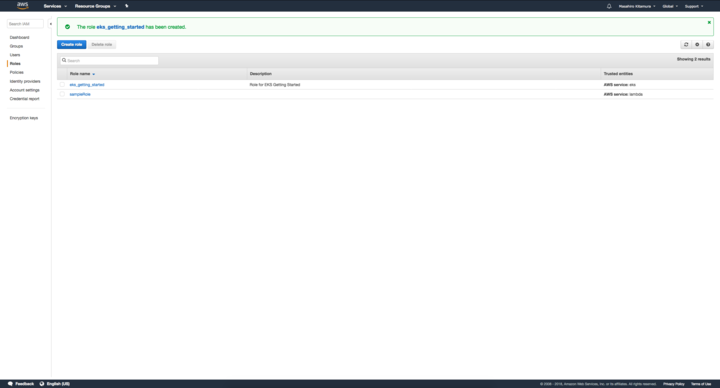 IAMロールが出来ました。
 CloudFormationでクラスタを組んでいきます。
今のところ、EKSが使えるリージョンはUS West(Oregon) (us-west-2)とUS East(N.Virginia) (us-east-1)の二カ所です。今回はUS Eastでやっていきます。
CloudFormationでクラスタを組んでいきます。
今のところ、EKSが使えるリージョンはUS West(Oregon) (us-west-2)とUS East(N.Virginia) (us-east-1)の二カ所です。今回はUS Eastでやっていきます。
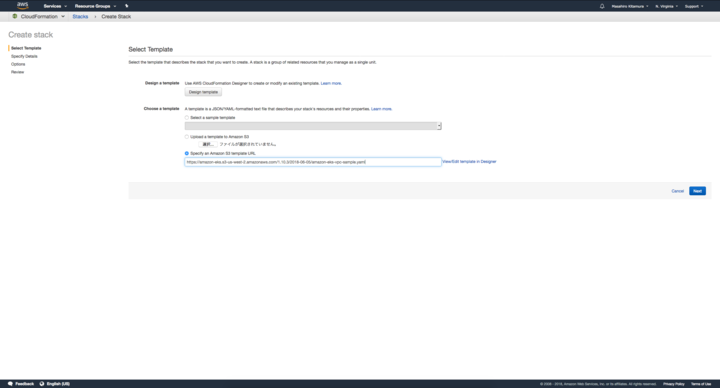
CloudFormationでCreate Stackをやっていきましょう。
S3 template URLが用意されていますので、これを入力します。
template URLはhttps://amazon-eks.s3-us-west-2.amazonaws.com/1.10.3/2018-06-05/amazon-eks-vpc-sample.yamlです。
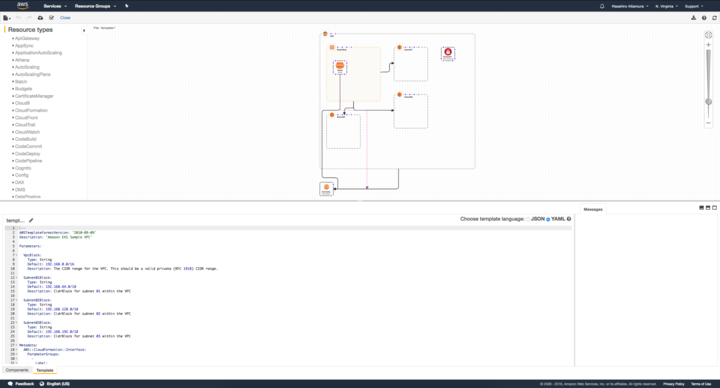 Viewしてみるとこんな感じです。なるほど。
細かい設定的なところは全くいじらず、さくさく進めていきます。Stack nameはGettingStartedにしました。
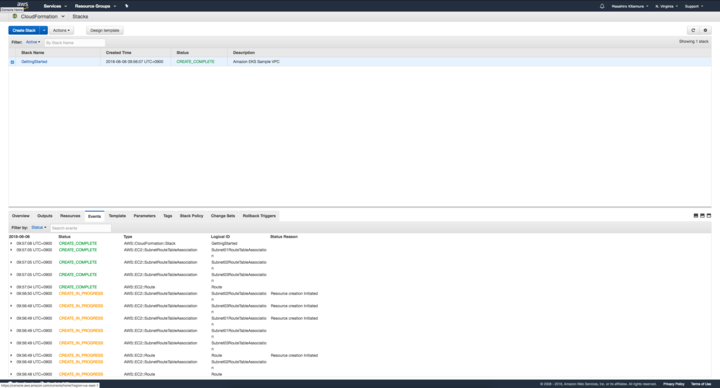 できた。
できた。
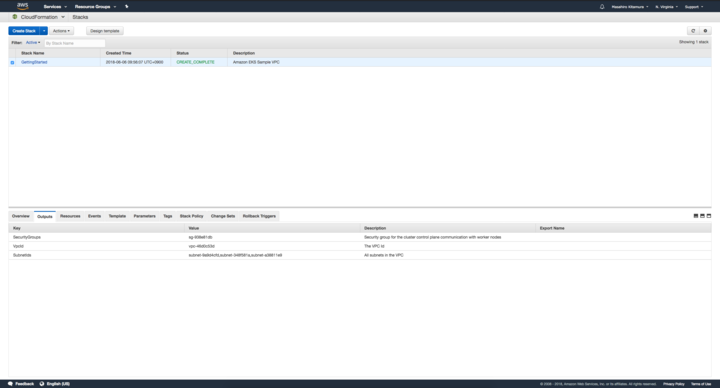 Outputのタグを選択して、SecurityGroupsとVpcIdとSubnetIdsを(一応)メモっておきます。2
次にkubectlの設定をしておきます。 最新のkubectl(1.10以降)をインストールしておいてください。まだインストールしていない場合はEKS側でも配信しているようなのでそれを使ってもOKです。
EKSでは認証にheptio-authenticator-awsを使用するようなので、こちらもドキュメントに従い導入します。
私はいろいろ考えるのが面倒だったため、go getしました。
| |
ヘルプを表示して、正常に導入出来たかざっくり確認します。
| |
ここで注意なのですが、ガイドではDownload and Install the Latest AWS CLIのところにOptionalってついてるんですが、これはほぼ必須です。 AWS CLIがないとクラスタに接続出来ないので、AWS CLIをインストールしておきます。
ではいよいよ、EKSでクラスタを作っていきます。 ここで私は若干手間取ったのですが、EKSでクラスタを作るのはルートクレデンシャルでログインしている状態ではだめで、IAMユーザを作る必要がありました。 普段からAWSをごりごり使っている人はアレですが、私みたいにほとんど使ってない人は注意が必要です。
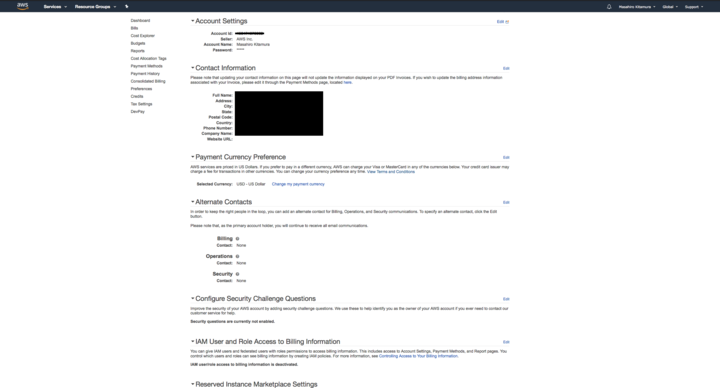 アカウントの詳細画面を開いて、アカウントIDをメモります。
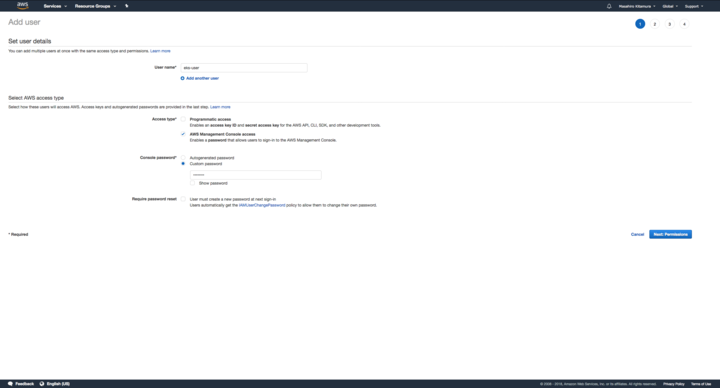
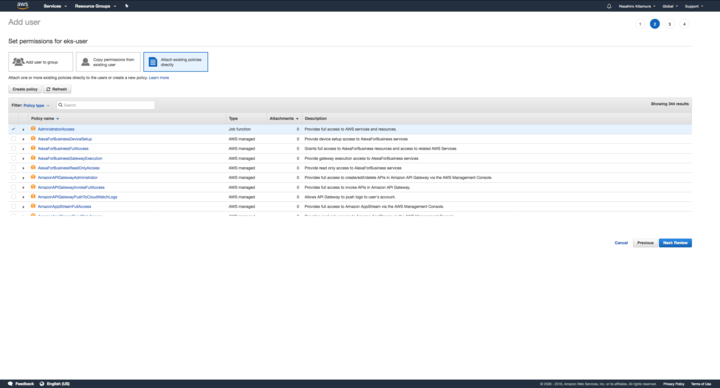 ざっくりIAMユーザを作ります。今回は適当にeks-userとしました。
権限も、何が必要なのかよくわからなかったのでAdministrator Accessとしておきました。
本番ではちゃんとやらなきゃだめですね。
ざっくりIAMユーザを作ります。今回は適当にeks-userとしました。
権限も、何が必要なのかよくわからなかったのでAdministrator Accessとしておきました。
本番ではちゃんとやらなきゃだめですね。
 はい。
はい。
 一旦ログアウトし、IAMユーザを使ってログインします。
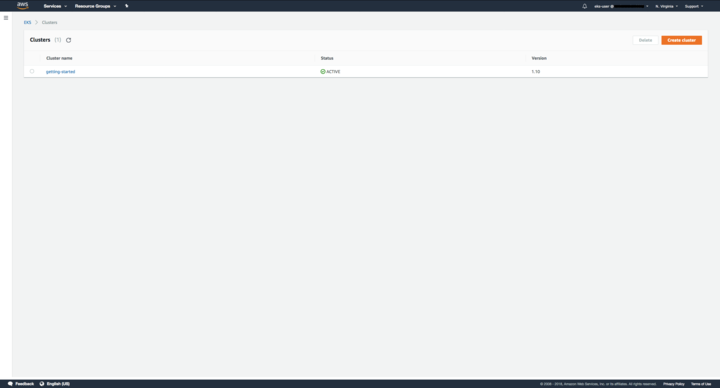
 EKSのトップページでクラスタ名を入れます。今回はgetting-startedとしました。
 いろいろな情報を入れていきます。
これらはCloudFormationで作った奴ですね。
いろいろな情報を入れていきます。
これらはCloudFormationで作った奴ですね。
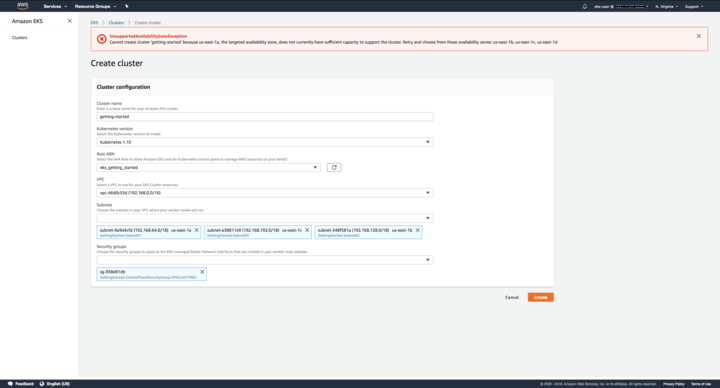 エラーが出ました。ガイドを見ると、どうしたら良いか書いてあります。
Important
You may receive an error that one of the Availability Zones in your request does not have sufficient capacity to create an Amazon EKS cluster. If this happens, the error output contains the Availability Zones that can support a new cluster. Retry creating your cluster with at least two subnets that are located in the supported Availability Zones for your account.
サブネットのアベイラビリティゾーン(AZ)がたりないよ、と。ふむ。
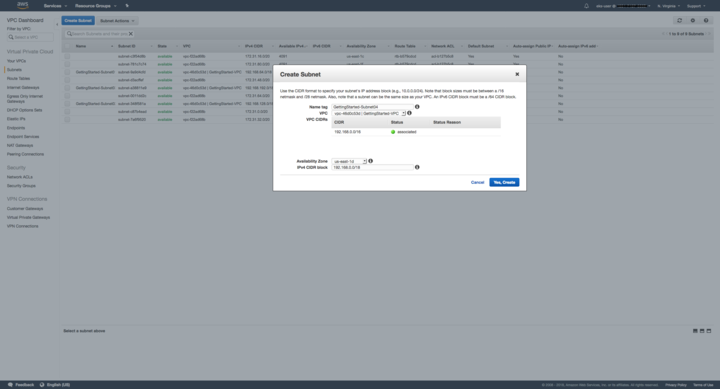 VPCのページに行き、さくっとサブネットを作ってきます。
最低二つ、EKSが使えるAZが有ればOKとのことなので、一個足しておきます。
VPCのページに行き、さくっとサブネットを作ってきます。
最低二つ、EKSが使えるAZが有ればOKとのことなので、一個足しておきます。
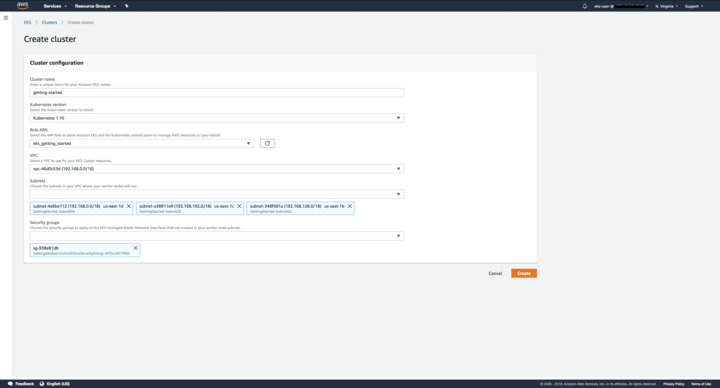 作ったサブネットを入れて再挑戦。
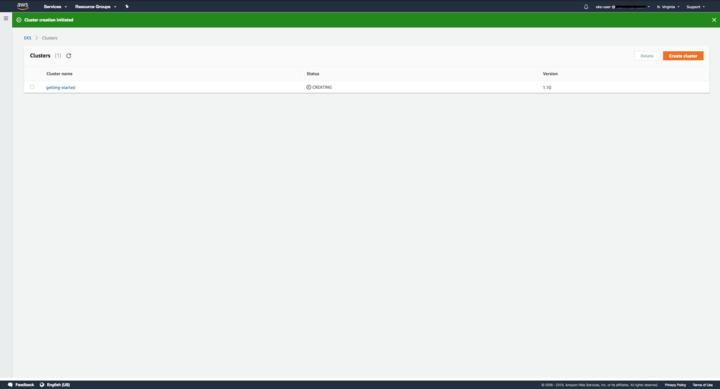 今度は上手くいきました。
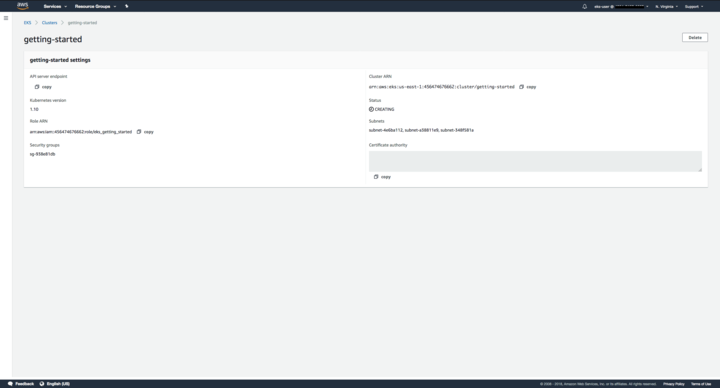 CREATINGで結構時間がかかるので、API server endpointとCertificate authorityの値をメモっておきます。
あと、このタイミングでAWS CLIに認証情報を設定しておきます。今回で言うと、eks-userの認証情報をaws configureで突っ込んでおきます。
加えて、kubectlの設定をしていきます。
~/.kube/config-getting-startedとして次の内容で設定ファイルを作ります(getting-startedは適宜クラスタ名にする)。
| |
ここで、<endpoint-url>と<base64-encoded-ca-cert>はそれぞれさっきメモをしたAPI server endpointとCertificate authorityで、<cluster-name>はクラスタ名(今回だとgetting-started)で置き換えます。
shellでexport KUBECONFIG=$KUBECONFIG:~/.kube/config-getting-startedとして、設定ファイルを読み込みます。
 そうこうしている間にクラスタがActiveになったりならなかったり(意外と時間がかかるので)するので、Activeになったら、次のコマンドで設定の確認をします。
| |
私はここで、kubectlのバージョンが古く、かつAWS CLIの設定をしていなかったがために結構困りました。
ユーザ名とパスワードを聞かれたり、答えてもForbiddenだったり、error: You must be logged in to the server (Unauthorized)とか言われたり。
これらはまだ良いのですが、error: the server doesn't have a resource type "cronjobs"とかって訳のわからんエラーが出たりして大変困りました。
kubectlのバージョンとAWS CLIの設定に要注意です。
上手くいったら、ワーカーノードを立てていきます。 ワーカーノードの作成もCloudFormationでさくっとやりましょう。
 先ほどと同じく、S3 template URLが用意されています。
https://amazon-eks.s3-us-west-2.amazonaws.com/1.10.3/2018-06-05/amazon-eks-nodegroup.yamlを入力しましょう。
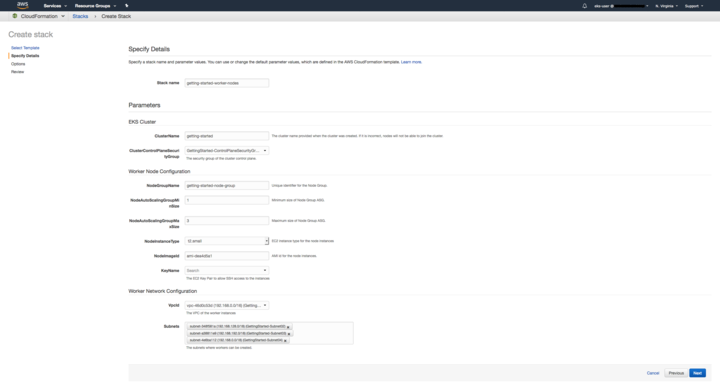 Stack名はgetting-started-worker-nodesとしました。
ClusterNameにはそのままクラスタ名(getting-started)を入力。
NodeGroupNameは適当につけておきます。
MinSizeとMazSizeはそのまま、NodeInstanceTypeは
Stack名はgetting-started-worker-nodesとしました。
ClusterNameにはそのままクラスタ名(getting-started)を入力。
NodeGroupNameは適当につけておきます。
MinSizeとMazSizeはそのまま、NodeInstanceTypeはt2.smallにしました(今回は検証なので)。
NodeImageIdなんですが、これはリージョンによって違います。
| Region | AMI ID |
|---|---|
| US West | ami-73a6e20b |
| US East | ami-dea4d5a1 |
今回はUS Eastなのでami-dea4d5a1と入力しました。
KeyNameにはキーペアを選択して入れます。EC2インスタンスに直接SSHする予定がなくても、選択しないと、作成中に失敗しますので、入れておきます。
VpcIdとSubnetsはクラスタに使ったものを入れておきます。
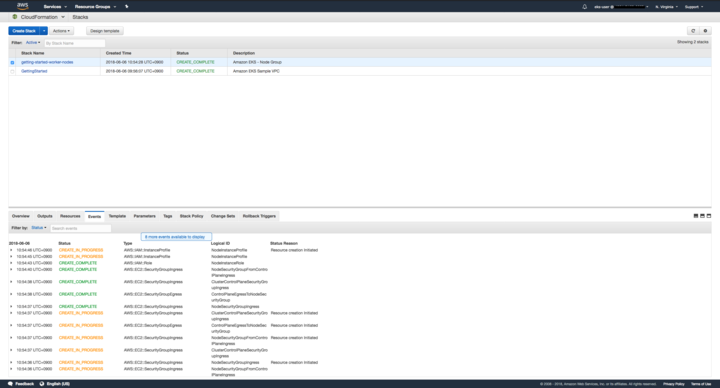 できました。Outputのタブを選択して、NodeInstanceRoleをメモっておきます。
コマンドラインで、ノードをクラスタに追加します。
| |
設定ファイルをダウンロードしてきて、<ARN of instance role (not instance profile>の部分に先ほどのNodeInstanceRoleを書き込みます。
| |
で、applyします。
| |
ざっくりノードが追加されたことを確認します。
| |
問題なさそうですね。
一応、guest bookアプリもやっておきます。
| |
出来ました。 ブラウザからアクセスしてみます。
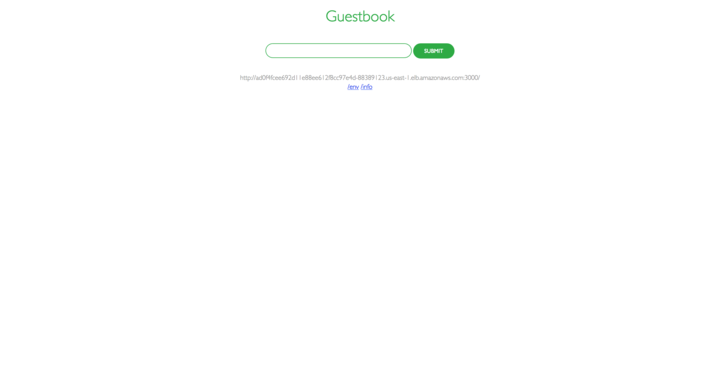 よさそうですね。
動作確認が出来たらもういらないのでguestbookは消してしまいます。
| |
はい。 なかなか手数は多いですが、難しいことはあまりありませんでした。 AWS CLIが暗黙的に使われてて、Optionalとか書かれてたのがちょっとくせ者ですね。